Today I want to talk about the Total Wordpress theme by WPExplorer. We'll look at…

Sometimes all we have is a bad image to work with. That’s the reality, unfortunately.
Whether you have to enlarge an image above 100% of it’s actual size or if you are trying to fix a blurred image, unsharp mask in Photoshop is a life saver.
.jpg compression is another issue that can rob you of your clarity. Over-compressed images look bad and sometimes are all we have to work with.
When I am trying to fix an image, I will run my unsharp mask after a good color correcting. My primary setting is:
Amount: 400%
Radius: .2 pixels
Threshold: 0 levels
Sometimes, I will go up to a .3 on the radius, but only if the image has been very degraded and needs a little extra sharpening. Sometimes it can further damage the image, so be careful.
With this recipe, I can create images that are always crisp. Even when you reduce the size of an image, it blurs the pixels slightly.
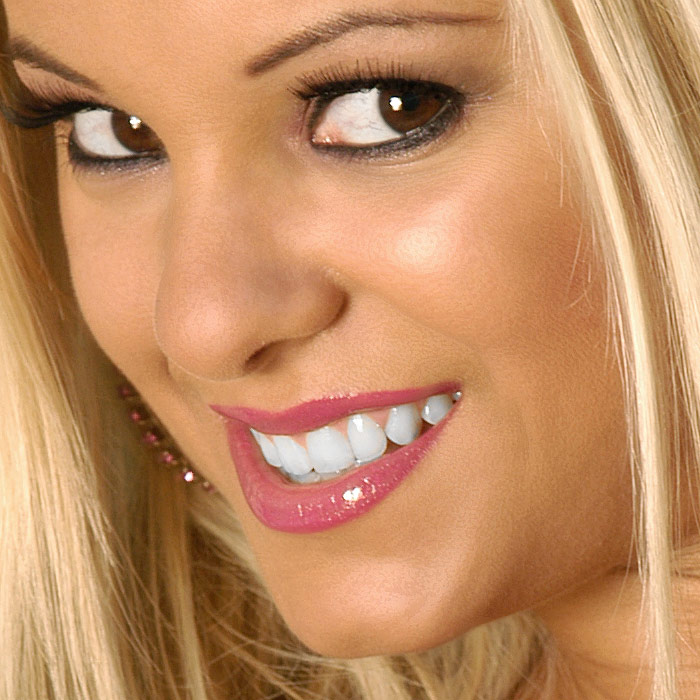
Reduce a large image to 300 wide. You will see the best results by using an image of a person. Unsharp Mask sharpens edges, not the whole image. Now run an unsharp mask on it and toggle back and forth with your undo keys. You will see how it sharpens up the eyes, teeth, and hair very nicely. Additionally, if you mouse over the image above, it will swap out with a sharpened version. It’s very subtle, but you can see how it crisps up her eyes and teeth.
You can set up this filter to run in a batch with your Photoshop actions. Have it run the unsharp mask after you reduce the size of said image. Your images will look awesome. :)
Related Posts